
Introduction
Learning to code can feel overwhelming at first—but with the right set of tools, beginners can accelerate their progress, stay organized, and write better code from day one. In this blog post, we’ll walk through seven essential, 100% free tools that every new coder should have in their arsenal. From writing and testing code locally to collaborating online and designing assets, these tools will cover the core needs of anyone starting out in web development, software engineering, or programming in general.
Whether you’re enrolling in an online tutorial, following a YouTube series, or diving into your first web project, each of the following tools will empower you to write code more efficiently, learn best practices, and even publish your work without spending a rupee. Let’s dive in!
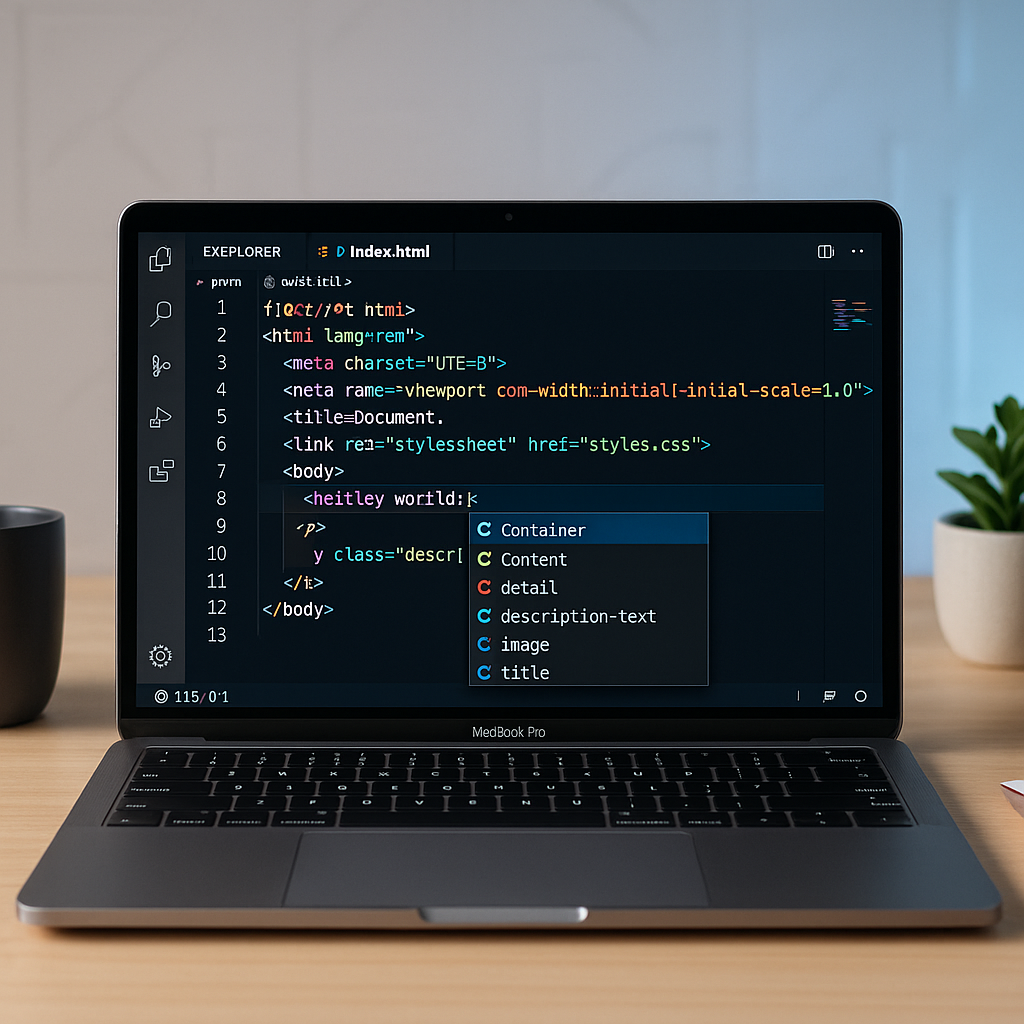
1. Visual Studio Code
Visual Studio Code (VS Code) is a lightweight yet powerful source-code editor developed by Microsoft. It has become one of the most popular code editors among beginners and professionals alike, thanks to its speed, extensibility, and robust feature set.
Why VS Code?
- Extensibility via Extensions: Install linters, formatters, language support (e.g., Python, JavaScript, C++), and productivity plugins in seconds.
- Integrated Terminal: Run command-line tasks (Node.js, Git, npm scripts) directly within the editor.
- Built-In Git Integration: Stage, commit, push, and pull without leaving VS Code.
- Smart IntelliSense: Autocomplete, real-time syntax checking, and code suggestions based on context.
- Cross-Platform: Available on Windows, macOS, and Linux, so you can work on any operating system.
How to Get Started
- Visit code.visualstudio.com.
- Download and install the free version for your OS.
- Open VS Code and customize your theme, font size, and keyboard shortcuts under Settings.
- Browse the built-in Extensions Marketplace (click the square icon on the left) to add languages and tools.
Key Extensions for Beginners
- Prettier (code formatter): Keeps your JavaScript, HTML, and CSS tidy.
- ESLint (JavaScript linter): Helps you follow best practices and avoids common errors.
- Live Server: Launches a local development server with live reload for static & dynamic pages.
- Bracket Pair Colorizer 2: Color-codes matching brackets, making nested code easier to read.
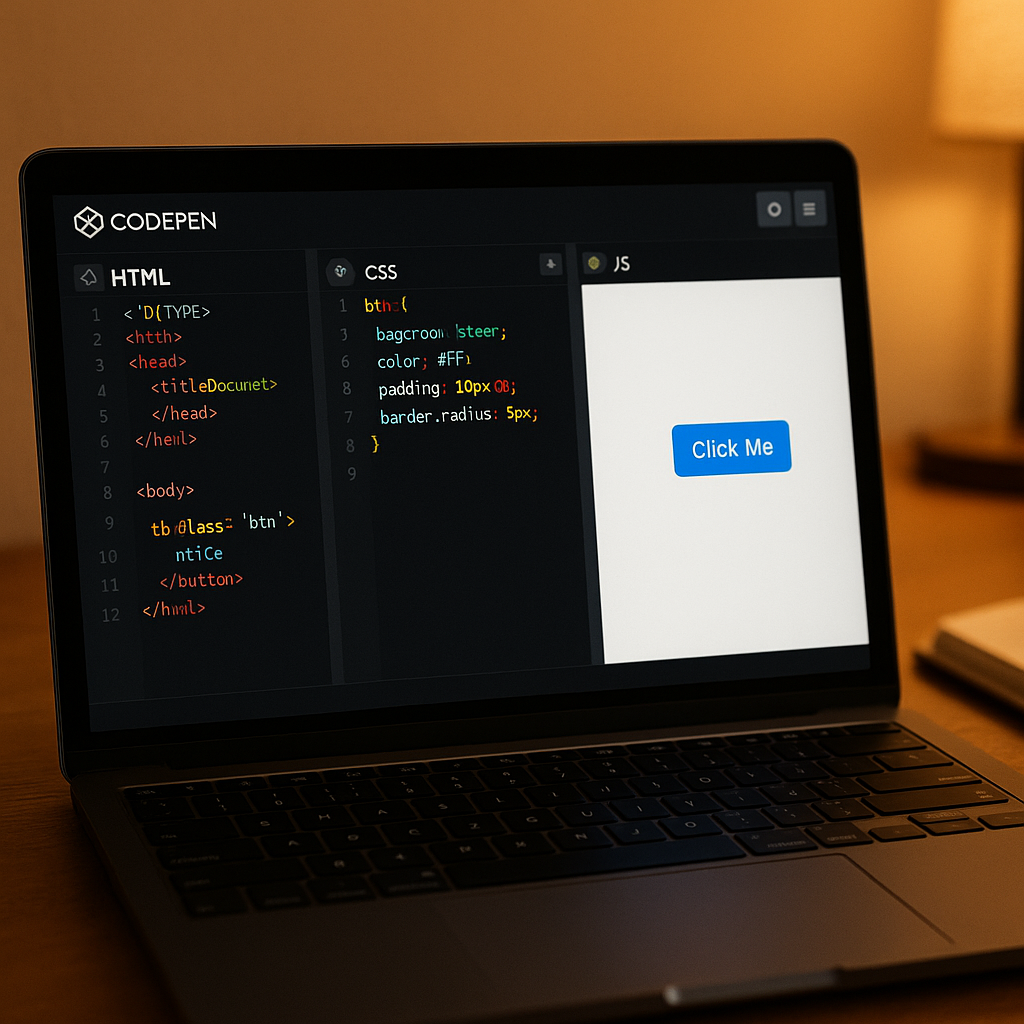
2. CodePen
CodePen is an online code editor and front-end development playground where you can write, test, and share HTML, CSS, and JavaScript snippets (called “pens”) in real time.
Why CodePen?
- No Setup Required: Start coding instantly in your browser—no installations needed.
- Live Preview: See your changes rendered live, making it easy to debug and tweak designs.
- Community Showcase: Explore thousands of pens created by other developers—great for inspiration.
- Collaboration: Share links with friends or instructors and collaborate on the same pen.
- Embedded Snippets: Embed working code examples into blogs, tutorials, or portfolios.
How to Use CodePen
- Go to codepen.io and sign up for a free account.
- Click “Create” → “New Pen”.
- Start typing HTML in the left panel, CSS in the middle, and JavaScript in the right.
- As you type, the result appears in the bottom pane—perfect for instant feedback.
- Save your pen, add tags (e.g., “HTML”, “CSS”, “beginner”), and share the URL with others.
3. GitHub
GitHub is the world’s largest platform for hosting and collaborating on code using the Git version control system. Even as a beginner, learning GitHub will help you track changes, collaborate with others, and build a professional portfolio.
Why GitHub?
- Version Control: Track every change you make, revert to previous versions, and maintain a complete history of your project.
- Remote Backups: Store your code in the cloud—never worry about losing your local copy.
- Collaboration: “Fork” other people’s repositories, submit pull requests, and contribute to open-source projects.
- Portfolio Building: Showcase your personal projects and coding exercises on a public profile.
- Free Private Repos: GitHub now offers free private repositories, so you can work on personal projects before making them public.
Getting Started with GitHub
- Create a free GitHub account at github.com.
- Install Git on your computer (download from git-scm.com).
- In your terminal, configure Git with:
git config --global user.name "Your Name"
git config --global user.email "you@example.com"
4. To create a new project:
- In GitHub, click “New” → “New repository”, give it a name, and click “Create repository.”
- Clone it locally with: bashCopyEdit
git clone https://github.com/yourusername/your-repo.git
cd your-repo
5. Make changes to code files, then stage, commit, and push:
git add .
git commit -m "Initial commit"
git push origin main

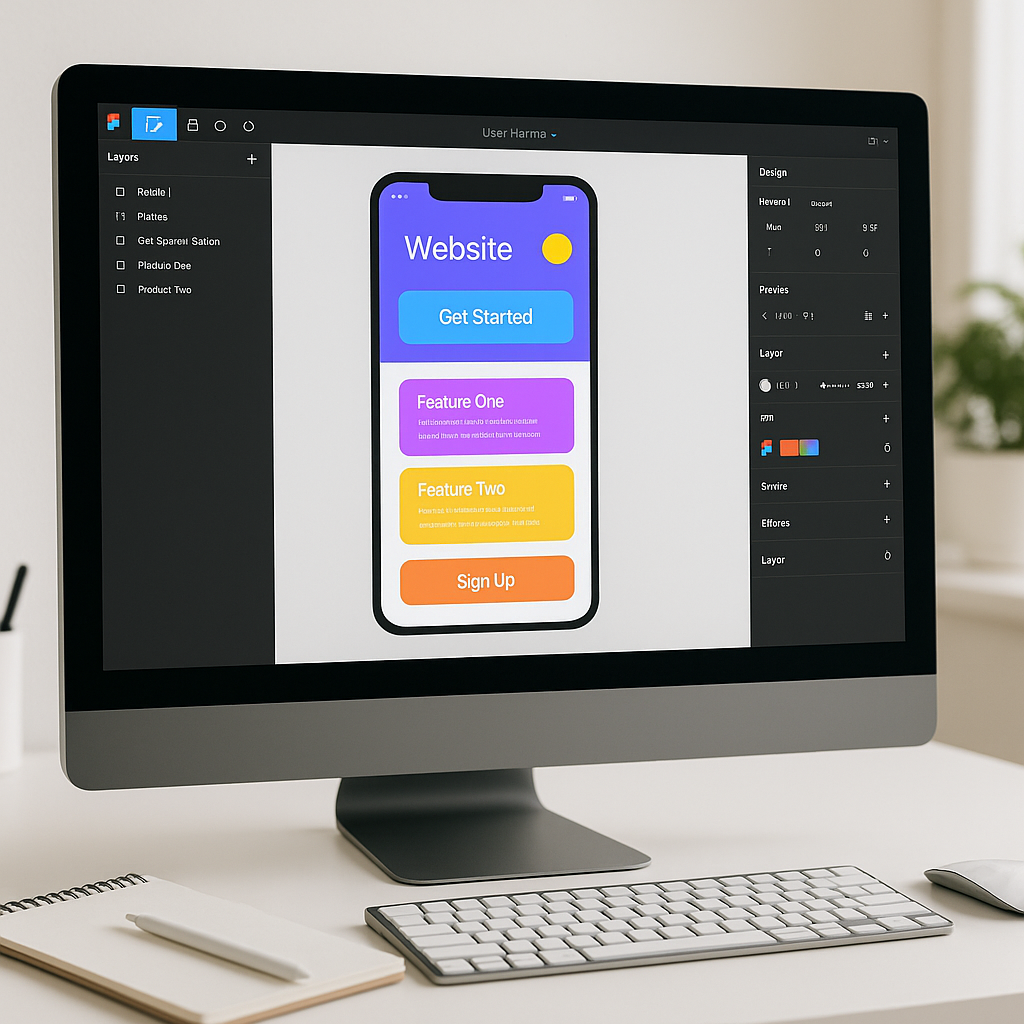
4. Figma
Figma is a free, browser-based UI/UX design and prototyping tool. While designers use it extensively, developers can also benefit from Figma when they need to interpret mockups, inspect CSS properties, and collaborate with designers.
Why Figma?
- Cloud-Based Collaboration: Multiple people can view and edit designs simultaneously—great for working with teammates or following along with tutorial files.
- Free Starter Plan: Figma’s free tier includes unlimited files and projects, enough for beginners to practice UI/UX design.
- Inspect Mode: Developers can click on UI elements to see exact measurements, CSS snippets, and color codes.
- Design Systems & Libraries: Access community-created icon sets, templates, and UI kits—no need to build everything from scratch.
- Built-In Prototyping: Create interactive prototypes without writing any code to test layouts, animations, and user flows.
How to Get Started with Figma
- Go to figma.com and sign up for a free account.
- Click “New File” to open a blank canvas, or explore Community files to fork (duplicate) existing projects.
- Use the left-hand toolbar to draw frames, place text, and insert shapes.
- To inspect a design: select any element and click the “Inspect” tab on the right to see CSS/HTML properties.
- Share your design or invite collaborators via a link.
5. Font Awesome
Font Awesome is a free icon library that provides thousands of scalable vector icons (SVG) and web fonts. Icons are an essential part of modern web design—Font Awesome makes it easy to include them in any project.
Why Font Awesome?
- Huge Icon Collection: Access over 1,600 free icons spanning categories like social media, interface controls, and brand logos.
- Easy Integration: Add icons via a CDN link or install via npm—no need to download individual image files.
- Customizable: Scale, color, and animate icons with simple CSS classes.
- Lightweight: Vector icons ensure crisp quality on all screen sizes, without slowing down your site.
- Community & Pro Upgrade: The free tier is generous; you can upgrade later for additional icons and features.
How to Add Font Awesome to Your Project
- Include the CSS CDN link in your HTML
<head>:
<link
  rel="stylesheet"
  href="https://cdnjs.cloudflare.com/ajax/libs/font-awesome/6.0.0-beta3/css/all.min.css"
  integrity="sha512-Fo3rlrZj/k7ujTU5oGzLrY4Zqul+0kJYc5tbU9B7mXYIi8+KX0ThxO9Gk5+2X0gN87aQFocKfT//tm8BY0RwA=="
  crossorigin="anonymous"
  referrerpolicy="no-referrer"
/>
2. Use an icon in your HTML:
<i class="fas fa-code"></i> <!-- Displays a code icon -->
<i class="fab fa-github fa-2x"></i> <!-- Displays the GitHub brand icon, 2× size -->
3. Customize size and color with CSS classes or inline styles:
<i class="fas fa-coffee" style="color: #ff6600; font-size: 48px;"></i>
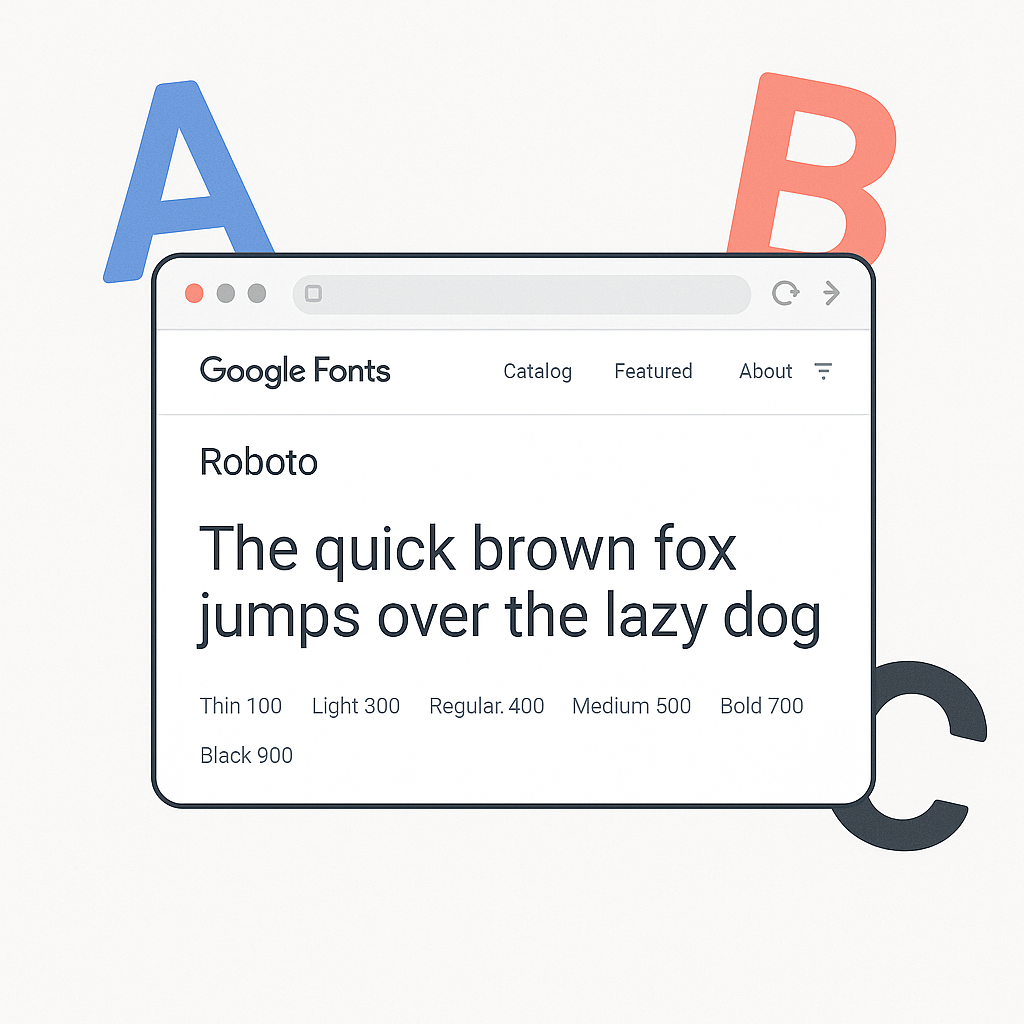
6. Google Fonts
Google Fonts is a free library of over 1,400 open-source font families. Using custom web fonts can instantly elevate your website’s visual appeal—Google Fonts makes it easy to browse, select, and integrate fonts without any licensing hassles.
Why Google Fonts?
- Vast Selection: Choose from serif, sans-serif, display, handwriting, and monospace fonts to match any project’s style.
- Easy to Use: Embed fonts with a simple
<link>tag or import via CSS—no download required. - Performance-Optimized: Google hosts fonts on fast, global servers, ensuring quick load times.
- Customization: In the Google Fonts interface, adjust weight (e.g., 400, 700) and subsets (e.g., Latin, Cyrillic) to optimize performance.
- Consistent Rendering: Fonts are automatically served in modern formats (WOFF2, WOFF) to maintain compatibility across browsers.
How to Apply Google Fonts
- Visit fonts.google.com.
- Search or filter to find a font you like—for example, “Roboto” or “Open Sans.”
- Select the font, choose the weights you need (e.g., Regular 400, Bold 700), and click “Embed”.
- Copy the generated
<link>tag into your HTML<head>:
<link rel="preconnect" href="https://fonts.googleapis.com">
<link rel="preconnect" href="https://fonts.gstatic.com" crossorigin>
<link
  href="https://fonts.googleapis.com/css2?family=Open+Sans:wght@400;700&display=swap"
  rel="stylesheet"
>
5. In your CSS, apply the font:
body {
  font-family: 'Open Sans', sans-serif;
}
h1 {
  font-family: 'Open Sans', sans-serif;
  font-weight: 700;
}
7
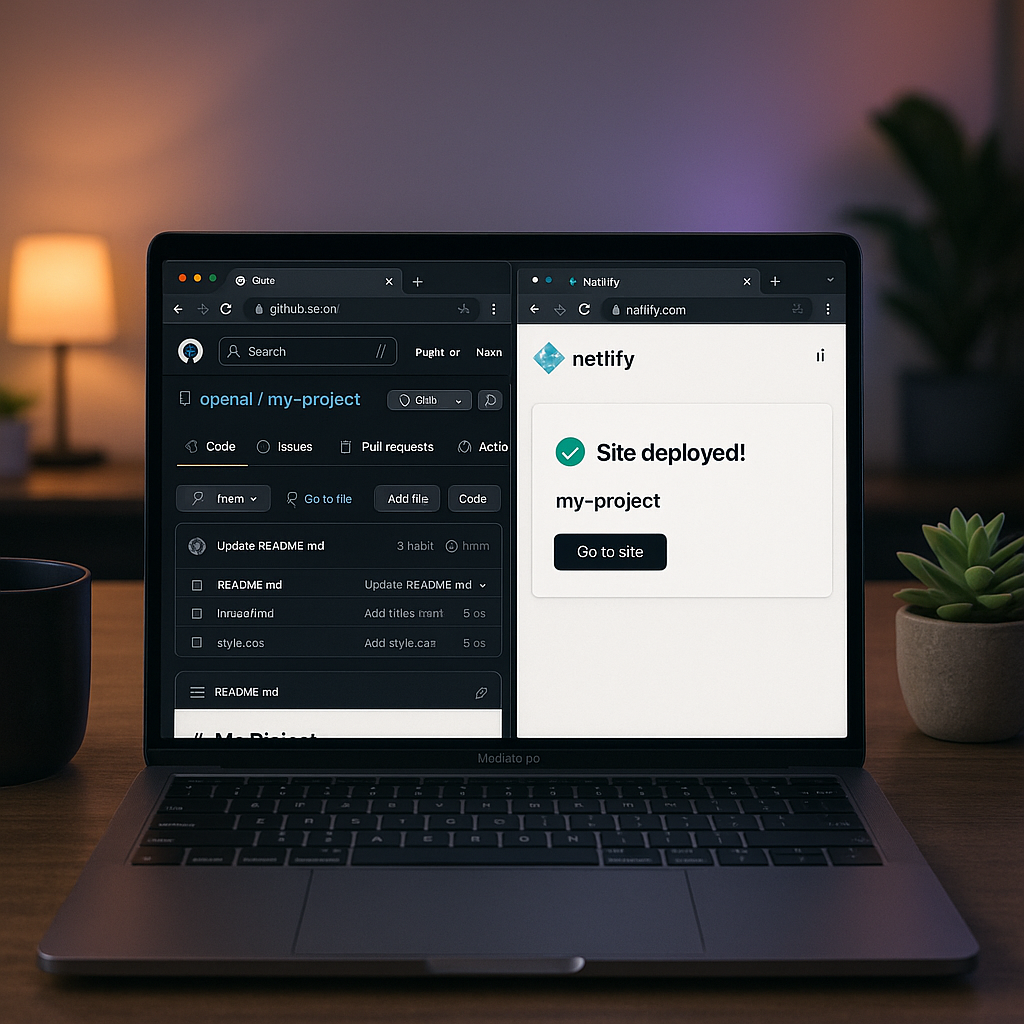
7. Netlify
Netlify is a platform that simplifies deploying and hosting static websites (HTML, CSS, JavaScript) directly from your GitHub repository. With Netlify, you can go from code to a live site in just a few clicks—no server setup required.
Why Netlify?
- Free Tier with Generous Limits: Netlify offers free hosting for personal and hobby projects, including continuous deployment, HTTPS, and a global CDN.
- Continuous Deployment: Link your GitHub repository to Netlify. Pushing code to the main branch automatically redeploys your site.
- Built-In Features: Enjoy features like form handling, split testing, and prerendering without extra configuration.
- Custom Domain Support: Use your own domain (e.g., www.myportfolio.com) with free SSL certificates.
- Serverless Functions: Add backend functionality (e.g., simple APIs) without maintaining a server.
How to Deploy a Site on Netlify
- Create a free Netlify account at netlify.com.
- In your GitHub repo (e.g., a static site project), ensure you have an
index.htmland any build commands defined (if using a static-site generator). - In Netlify, click “New site from Git”, then choose GitHub and authorize Netlify.
- Select your repository, set the build command (if any), and the publish directory (e.g.,
dist/or/). - Click “Deploy site”. In a minute or two, your site will be live on a
*.netlify.appsubdomain. - Optionally, configure a custom domain under Site Settings → Domain management.
Conclusion
Embarking on your coding journey is easier when you have the right tools in hand. By integrating these Top 7 Free Tools into your workflow, you’ll:
- Write and Debug Code Smoothly (VS Code)
- Experiment and Share Front-End Snippets (CodePen)
- Manage Versions and Collaborate (GitHub)
- Design or Inspect UI Mockups (Figma)
- Enhance Your Site with Scalable Icons (Font Awesome)
- Choose Beautiful Web Fonts Effortlessly (Google Fonts)
- Deploy Your Projects Live in Minutes (Netlify)
Take the time to explore each platform, watch a few tutorials, and practice building small projects. As you grow in confidence, these tools will help you level up from beginner to intermediate and beyond—without spending any money.
Ready to start coding? Install VS Code, sign up on CodePen and GitHub, and experiment with a simple web page using Google Fonts and Font Awesome icons. When your page is ready, deploy it to Netlify and share the live link with friends or on social media.
Happy coding!